


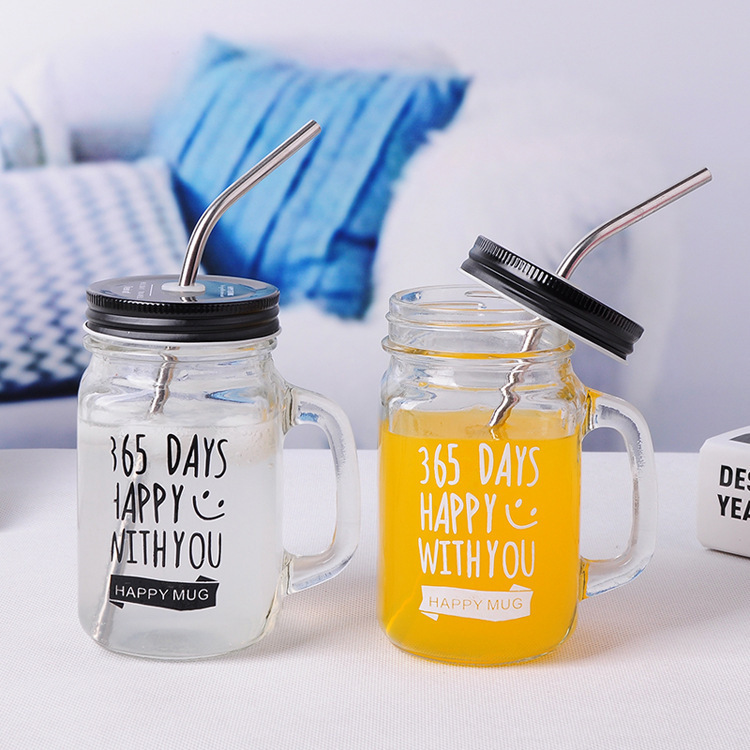
Glass has the characteristics of being flat, clear, and simple to clean as a component for architectural ornamentation. After screen printing, the design on the glass is delicate and attractive. It is more prevalent for building decorating and satisfies people’s aesthetic demands in a significant way.
Screen printing is a technique for printing pictures directly onto a glass surface. Screen printing might also be used to apply preservatives or other materials to portions of the glass surface that would otherwise be damaged by etching or sanding. It’s also feasible to print specific inks directly on the paper to project an etching or matte look.
Now, let’s have a deep dive on how to paint glass using the screen printing technique. Keep Reading!
What is Screen Printing?
Screen printing is the technique of utilizing a mesh screen, ink, and a squeegee to transfer a stencilled image onto a flat surface. Fabric and paper are the most common screen-printed media, although specialist inks may also be used to print different materials, including glass.. The most simple approach is making a stencil on a fine mesh screen and then forcing ink through it to imprint your pattern on the surface underneath.
While the printing procedure is typically pretty identical, the manner the stencil is made varies based on the materials utilized. Stencilling may be done in a variety of ways, including:
● Cover the appropriate sections of the screen with masking tape or vinyl.
● Plaster the stencil onto the mesh with screen protectors like glue.
● Creating a stencil using a light-sensitive emulsion, which is subsequently developed in the same way as a photograph.
Screen-printed designs might utilize a single colour of ink or a combination of colours. Colours must be applied in different layers for multicoloured things, using distinct stencils for each ink.
How can you Fulfil Screen Printing on Glass?
Screen printing flat glass glazes are typically 240 mesh, with 220 mesh being the most popular screen printing mesh for glass screen printing.
The glass printing screen is identical to the screen used for traditional screen printing. The type of silkscreen cloth to choose is determined by the printing purpose. For highly accurate fine glass goods, a mesh count of 300 to 360 mesh is necessary. Polyester and nylon synthetic mesh can be utilized for infrared hot stamping glaze printing. Because it is cost-effective for a limited amount of glass screen printing types, this form of screen printing is widely utilized.
Below are the steps to use to fulfil the screen printing on glass.
1.Create a Design
To begin, print the design they wish to appear on the completed product onto a clear acetate film. This is going to be utilized to make the stencil. Now, as you choose this design, you need to have in mind the glass bottle design as well. This helps you to not only create a design of your choice, but also the one that suits your product’s bottle.
2.Prepare the Screen
Now, select a mesh screen based on the design’s intricacy as well as the thickness of the glass being printed. After that, a coating of light-reactive emulsion is applied to the mesh screen, which hardens when exposed to bright light.
3.Expose the Emulsion
The design is subsequently transferred from the acetate sheet to the emulsion-coated screen, which is then subjected to very strong light. Because the emulsion is hardened by light, the areas of the screen that are obscured by the design stay liquid.
If the final design includes more than one colour, each layer of ink must be applied using a distinct screen. To make multi-coloured goods, the printer must utilize his artistic ability to design each stencil and line them up properly to achieve a flawless final design.
4.Wash the Emulsion off, to Create the Stencil
The portions of the screen not concealed by the design will have hardened hard once the screen has been exposed for a certain amount of time. Any emulsion that hasn’t solidified needs to be carefully washed away. The design is clearly imprinted on the screen, allowing the ink to pass thru.
After the screen has dried, you can perform any required changes to ensure that the imprint is as close to the original design as conceivable. The stencil is now complete and ready to use.
5.Prepare the Glass for Printing
Afterwards, the screen is then mounted on the printing press. Beneath the screen, the glass to be printed is positioned flat on the printing board.
Although there are manual and automatic presses, most current commercial printers will utilize an automatic rotating carousel printer(so you are free to do so by the way), which allows multiple separate screens to work at the same time. This type of printer may also be used to apply the various colour layers in rapid succession for multicoloured prints.
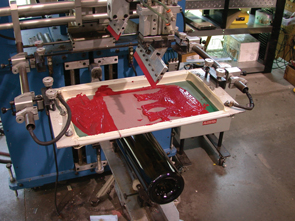
6.Press the Ink Through the Screen on the Glass
The screen is placed on the printing board and lowered. A squeegee is used to drag the ink along the whole length of the screen once it has been applied at the top end. This forces ink thru the stencil’s exposed regions, impressing the design on the glass beneath.
You can lift the screen and place a fresh piece of glass onto the printing board if you want to produce numerous pieces. After that, the procedure is repeated.
Remove the emulsion using a specific cleaning solution once all of the glasses have been printed and the stencil has served its function, so the mesh may be repurposed to make new stencils.
7.Dry Your Glass and Check Your Finished Work
After that, the printed glass is dried, which ‘heals’ the ink and gives it a smooth, colourfast surface. Before being passed on to its new owner, you should check the completed glass product, properly examine and clean it to eliminate any remnants.
Post time: Nov-17-2022